Science: Difference between revisions
Created page with "__NOTOC__ Delve into the depths of Cosmic Science by mining for gold and refining it into valuable scraps, ingots, and blocks. This newfound currency opens the doors to exclusive items at the science shop, previously out of reach. Plus, don’t overlook the automated bots that work tirelessly to elevate your island even while you’re away. Discover, refine, and thrive in a universe of endless opportunities! =Science Shop= right|700px {| class="..." |
No edit summary |
||
| (37 intermediate revisions by 2 users not shown) | |||
| Line 1: | Line 1: | ||
[[File:ScienceInfoV10.png|400px|right|link=]] | |||
Delve into the | Delve into the realms of Cosmic Science! Venture into [[Adventures]] to collect Science Gold through meteorites, mobs, vaults, and loot. Refine your findings into Scraps, Ingots, or Blocks, then trade this currency for powerful items—from Repair Scrolls and /is tool Boosters to Trinkets, Hoppers, and Baby Auto Bots. Whether you want to accelerate your island's progress, enhance your gear, or automate vital tasks, the doors to advanced science are wide open! | ||
=Golden Meteorites= | |||
[[File:GoldenMeteorite.png|350px|right|link=]] | |||
Golden Meteorites fall throughout /adventure, containing gold riches for players to mine. | |||
* Constantly spawn throughout an adventure, appearing anywhere above-ground | |||
* Base of '''10 Gold''' per meteorite, increasing with more players in your Adventure Instance | |||
* Despawn after a set amount of time if not interacted with | |||
* Auto-deposits into a '''Science Satchel''' if equipped in your off-hand | |||
| Line 48: | Line 20: | ||
=Golden Warriors= | |||
[[File:GoldenWarrior.png|350px|right|link=]] | |||
Golden Warriors are custom mobs found within POI areas in /adventure. | |||
* Spawn frequently throughout Adventures | |||
* Drop '''Science Socket Expanders''' and '''PvE Technology Enchantment Gems''' | |||
* PvE Technology Gems must be revealed at a [[The Facility#Golden Forge|Golden Forge]] | |||
| Line 62: | Line 36: | ||
=Golden Vaults= | |||
[[File:VaultRaidsFront.png|350px|right|link=Vault Raids]] | |||
Golden Vaults are a special variant of [[Vault Raids]] located in the Lawful Zone, identifiable by gold decor around the entrance. Opens with any tier of Vault Keycard but contains fewer Loot Chests—instead filled with '''Gold Resource Nodes''' that yield Science Scrap and '''Technology Enchantment Dust'''. | |||
<br><span style="font-size: 20px;">'''[[Vault Raids|Click here to see more info about Vaults!]]'''</span> | |||
| Line 75: | Line 49: | ||
=Science Shop Amplifiers= | |||
[[File:ScienceAmplifier2.png|500px|right|link=]] | |||
Science Amplifiers are special items found in the Legendary+ Loot Tables of the Lost Wasteland and Demonic Realm [[Adventures]]. When redeemed, they permanently unlock the next tier of the Science Shop for the player who applies them. You'll keep access to any lower‐tier items after upgrading, and each tier now appears on its own dedicated page in the Science Shop interface of /shop. Unlocking Science Amplifiers on an island will unlock that tier's Science Shop for the whole island. You can extract Science Gold from a trinket, removing the highest type of science applied to it first. | |||
*'''<span style="color:#FFAA00;">Science Amplifier II</span>''': Discovered in the Lost Wasteland /adventure. Unlocks Science Shop '''II''' (while retaining all Tier 1 items). | |||
<div class="tooltip-wrapper" style="width:84px;height:84px;position:relative;margin:0;border:none;"> | |||
[[File:1x1GUI.png|64px|64px|link=]] | |||
<div class="foreground-icon" style="position:absolute;top:27%;left:42%;transform:translate(-50%,-50%);width:44px;height:44px;"> | |||
[[File:KnowledgeBook.webp|24px|link=TargetPage]] | |||
<span class="tooltip-text">[[File:ScienceAmplifier2.png|300px|link=]]</span> | |||
</div> | |||
</div> | |||
*'''<span style="color:#FFAA00;">Science Amplifier III</span>''': Used after Tier 2 is unlocked. Allows access to Science Shop '''III''' providing even more advanced items. | |||
<div class="tooltip-wrapper" style="width:84px;height:84px;position:relative;margin:0;border:none;"> | |||
[[File:1x1GUI.png|64px|64px|link=]] | |||
<div class="foreground-icon" style="position:absolute;top:27%;left:42%;transform:translate(-50%,-50%);width:44px;height:44px;"> | |||
[[File:KnowledgeBook.webp|24px|link=TargetPage]] | |||
<span class="tooltip-text">[[File:ScienceAmplifier3.png|300px|link=]]</span> | |||
</div> | |||
</div> | |||
''HOVER OVER THE BOOK TO SEE ITS LORE'' | |||
'''Remember, you must unlock Tier 2 before using a Tier 3 Amplifier, so plan your journey wisely!''' | |||
=Science Shop Tiers= | |||
{{ScienceShopTiers}} | |||
= | |||
Latest revision as of 03:31, 13 February 2026
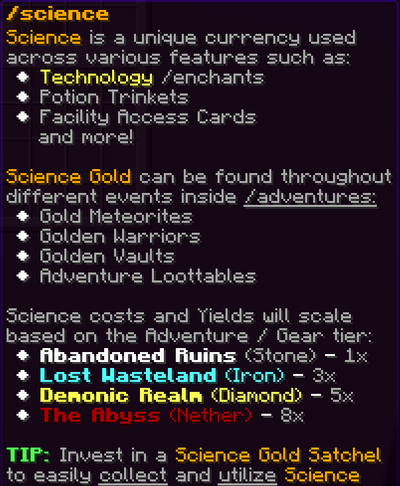
Delve into the realms of Cosmic Science! Venture into Adventures to collect Science Gold through meteorites, mobs, vaults, and loot. Refine your findings into Scraps, Ingots, or Blocks, then trade this currency for powerful items—from Repair Scrolls and /is tool Boosters to Trinkets, Hoppers, and Baby Auto Bots. Whether you want to accelerate your island's progress, enhance your gear, or automate vital tasks, the doors to advanced science are wide open!
Golden Meteorites
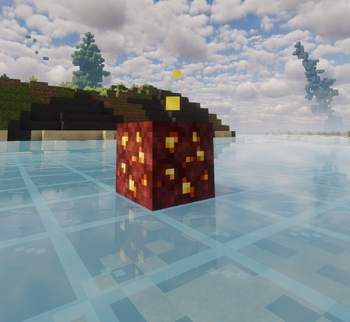
Golden Meteorites fall throughout /adventure, containing gold riches for players to mine.
- Constantly spawn throughout an adventure, appearing anywhere above-ground
- Base of 10 Gold per meteorite, increasing with more players in your Adventure Instance
- Despawn after a set amount of time if not interacted with
- Auto-deposits into a Science Satchel if equipped in your off-hand
Golden Warriors
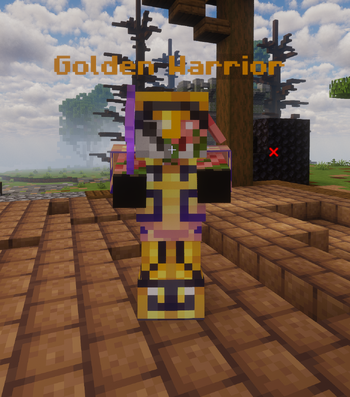
Golden Warriors are custom mobs found within POI areas in /adventure.
- Spawn frequently throughout Adventures
- Drop Science Socket Expanders and PvE Technology Enchantment Gems
- PvE Technology Gems must be revealed at a Golden Forge
Golden Vaults
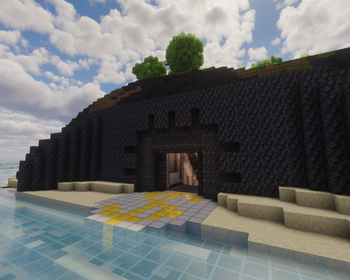
Golden Vaults are a special variant of Vault Raids located in the Lawful Zone, identifiable by gold decor around the entrance. Opens with any tier of Vault Keycard but contains fewer Loot Chests—instead filled with Gold Resource Nodes that yield Science Scrap and Technology Enchantment Dust.
Click here to see more info about Vaults!
Science Shop Amplifiers
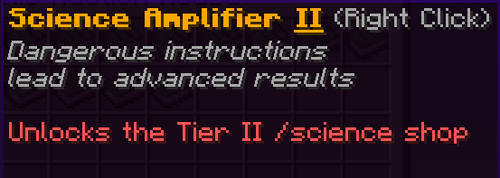
Science Amplifiers are special items found in the Legendary+ Loot Tables of the Lost Wasteland and Demonic Realm Adventures. When redeemed, they permanently unlock the next tier of the Science Shop for the player who applies them. You'll keep access to any lower‐tier items after upgrading, and each tier now appears on its own dedicated page in the Science Shop interface of /shop. Unlocking Science Amplifiers on an island will unlock that tier's Science Shop for the whole island. You can extract Science Gold from a trinket, removing the highest type of science applied to it first.
- Science Amplifier II: Discovered in the Lost Wasteland /adventure. Unlocks Science Shop II (while retaining all Tier 1 items).

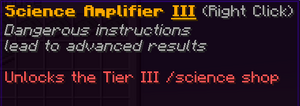
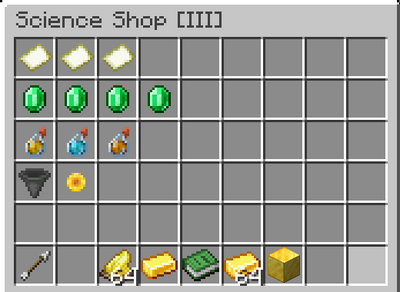
- Science Amplifier III: Used after Tier 2 is unlocked. Allows access to Science Shop III providing even more advanced items.

HOVER OVER THE BOOK TO SEE ITS LORE
Remember, you must unlock Tier 2 before using a Tier 3 Amplifier, so plan your journey wisely!
Science Shop Tiers
| Tier 1 Science Shop | |
|---|---|
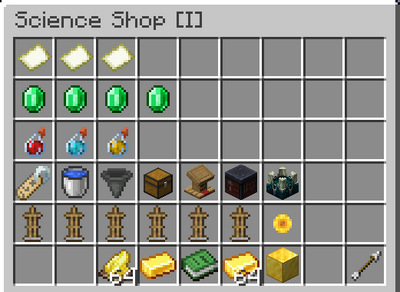
| |
| Item | Cost |
| Stone Repair Scroll (50%) | 20x Science Scraps |
| Stone Repair Scroll (75%) | 40x Science Scraps |
| Stone Repair Scroll (100%) | 60x Science Scraps |
| Stone Miners Pickaxe EXP Booster (1.15x, 20min) | 5x Science Ingots |
| Stone Slayers Sword EXP Booster (1.15x, 20min) | 5x Science Ingots |
| Stone Farming Hoe EXP Booster (1.15x, 20min) | 5x Science Ingots |
| Stone Trident EXP Booster (1.15x, 20min) | 5x Science Ingots |
| Healing Trinket (Max Uses 40) | 10x Science Scraps |
| Speed Trinket (Max Uses 8) | 3x Science Ingots |
| Strength Trinket (Max Uses 8) | 3x Science Ingots |
| Auto Bot Nametag | 3x Science Ingots |
| Infinite Water Bucket | 32x Science Ingots |
| Hoppers | 5x Science Ingots |
| Mini Collection Chest | 10x Science Ingots |
| Auto Tinkerer | 16x Science Ingots |
| Auto Gem Tinkerer | 32x Science Ingots |
| Mutated Mob Spawner | 32x Science Ingots |
| Baby Auto Slayer Bot | 10x Science Ingots |
| Baby Auto Fisher Bot | 10x Science Ingots |
| Baby Auto Miner Bot | 10x Science Ingots |
| Baby Auto Harvester Bot | 10x Science Ingots |
| Baby Auto Crafting Bot | 20x Science Ingots |
| Baby Auto Smelting Bot | 20x Science Ingots |
| Science Gold Satchel (25,000 Capacity) | 5x Science Ingots |
| Tier 2 Science Shop | |
|---|---|
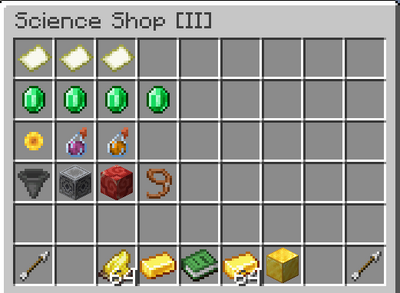
| |
| Item | Cost |
| Iron Repair Scroll (50%) | 2x Science Ingots |
| Iron Repair Scroll (75%) | 4x Science Ingots |
| Iron Repair Scroll (100%) | 6x Science Ingots |
| Iron Miners Pickaxe EXP Booster (1.15x, 20min) | 15x Science Ingots |
| Iron Slayers Sword EXP Booster (1.15x, 20min) | 15x Science Ingots |
| Iron Farming Hoe EXP Booster (1.15x, 20min) | 15x Science Ingots |
| Iron Trident EXP Booster (1.15x, 20min) | 15x Science Ingots |
| Science Gold Satchel (50,000 Capacity) | 32x Science Ingots |
| Regeneration Trinket (Max Uses 5) | 1x Science Block |
| Fire Resistance Trinket (Max Uses 8) | 1x Science Block |
| Hopper Dropper | 32x Science Ingots |
| Redstone Timer | 16x Science Ingots |
| Teleport Pad | 2x Science Blocks |
| Pet Leash | 1x Science Block |
| Tier 3 Science Shop | |
|---|---|
| |
| Item | Cost |
| Diamond Repair Scroll (50%) | 5x Science Ingots |
| Diamond Repair Scroll (75%) | 10x Science Ingots |
| Diamond Repair Scroll (100%) | 15x Science Ingots |
| Diamond Miners Pickaxe EXP Booster (1.15x, 20min) | 32x Science Ingots |
| Diamond Slayers Sword EXP Booster (1.15x, 20min) | 32x Science Ingots |
| Diamond Farming Hoe EXP Booster (1.15x, 20min) | 32x Science Ingots |
| Diamond Trident EXP Booster (1.15x, 20min) | 32x Science Ingots |
| Strength Trinket (Max Uses 24) | 5x Science Blocks |
| Speed Trinket (Max Uses 24) | 5x Science Blocks |
| Fire Resistance Trinket (Max Uses 24) | 5x Science Blocks |
| Hopper Dropper | 16x Science Ingots |
| Science Gold Satchel (100,000 Capacity) | 3x Science Blocks |

