Demonic Realm: Difference between revisions
No edit summary |
|||
| (8 intermediate revisions by 2 users not shown) | |||
| Line 1: | Line 1: | ||
__NOTOC__ | |||
Demonic Realm is the 3rd Adventure Map on Cosmic Sky. This adventure is unlockable with a Demonic Realm Adventure map | The Demonic Realm is the 3rd Adventure Map on Cosmic Sky. This adventure is unlockable with a Demonic Realm Adventure map. You can find pages to create this map in different loot tables including the previous adventures loot table. | ||
This adventure is limited to Diamond Weapons and Diamond Armor<br> | |||
This adventure is | = Adventure Zones = | ||
[[File:ADV3MAPV6.png|right||600px]] | |||
This adventure is divided into different zones, each with specific rules and risks. These zones are marked on the map to help you understand where you are and what to expect. | |||
=== <span style="color:#FFFFFF;">Lawful Zone (No Highlight)</span> === | |||
In Lawful Zone, PvP is DISABLED – players cannot attack or be attacked. This is your safe spawn area where you keep everything on death. | |||
=== | === <span style="color:#FFA500;">Neutral Zone Warning (Dark Orange Highlight)</span> === | ||
Yellow-highlighted areas indicate you are nearing the Neutral Zone at the center. This is a warning that PvP is enabled and you risk losing part of your inventory on death. | |||
=== <span style="color:#FFFF00;">Neutral Zone (Yellow Highlight)</span> === | |||
In Neutral Zone, PvP is ENABLED and you become Neutral with a 15‑minute timer. You keep your weapons and equipped gear on death but lose 25% of your inventory (with extra loss per player kill). This zone offers higher mob spawns and rewards than Lawful Zone. | |||
= | === <span style="color:#FFD700;">Chaotic Zone Warning (Light Orange Highlight)</span> === | ||
[[File:YijikiShadow.png|600px]] <br> | Orange-highlighted areas indicate you are nearing the Chaotic Zone. This is a warning that entering will turn you Chaotic and expose you to extreme risks. | ||
''' | === <span style="color:#FF0000;">Chaotic Zone (Red Highlight)</span> === | ||
The Chaotic Zone is the most dangerous part of the Adventure, split into two cave areas. Entering this area turns you Chaotic with a 15‑minute timer, and if you die, you lose your entire inventory and equipped gear. Only venture here if you are ready to face the ultimate challenge. | |||
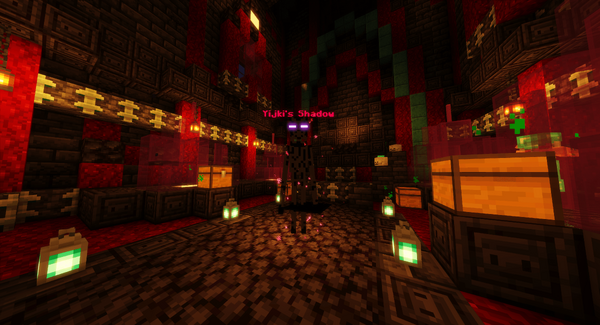
=Yijki's Shadow= | |||
[[File:YijikiShadow.png|600px|link=]] <br> | |||
<br><span style="font-size: 20px;">'''[[Bosses|See More info On Bosses Here!]]'''</span> | |||
Latest revision as of 05:16, 17 July 2025
The Demonic Realm is the 3rd Adventure Map on Cosmic Sky. This adventure is unlockable with a Demonic Realm Adventure map. You can find pages to create this map in different loot tables including the previous adventures loot table.
This adventure is limited to Diamond Weapons and Diamond Armor
Adventure Zones

This adventure is divided into different zones, each with specific rules and risks. These zones are marked on the map to help you understand where you are and what to expect.
Lawful Zone (No Highlight)
In Lawful Zone, PvP is DISABLED – players cannot attack or be attacked. This is your safe spawn area where you keep everything on death.
Neutral Zone Warning (Dark Orange Highlight)
Yellow-highlighted areas indicate you are nearing the Neutral Zone at the center. This is a warning that PvP is enabled and you risk losing part of your inventory on death.
Neutral Zone (Yellow Highlight)
In Neutral Zone, PvP is ENABLED and you become Neutral with a 15‑minute timer. You keep your weapons and equipped gear on death but lose 25% of your inventory (with extra loss per player kill). This zone offers higher mob spawns and rewards than Lawful Zone.
Chaotic Zone Warning (Light Orange Highlight)
Orange-highlighted areas indicate you are nearing the Chaotic Zone. This is a warning that entering will turn you Chaotic and expose you to extreme risks.
Chaotic Zone (Red Highlight)
The Chaotic Zone is the most dangerous part of the Adventure, split into two cave areas. Entering this area turns you Chaotic with a 15‑minute timer, and if you die, you lose your entire inventory and equipped gear. Only venture here if you are ready to face the ultimate challenge.